


Blaarkies
-
Posts
890 -
Joined
-
Last visited
Content Type
Profiles
Forums
Developer Articles
KSP2 Release Notes
Bug Reports
Posts posted by Blaarkies
-
-
Version 1.2.3
-
Fixes
- Mission Checkpoints panel and Focus Jumper panel did not display properly on Firefox browser
If you run into any issues, or have great ideas, please let me know
")
-
Fixes
-
Do you have any images of what you have been attempting?
Without images, it is hard to say if you should try lower TWR, higher wet/dry mass ratios, flight profiles, etc.
You can test the efficiency of such fuel transporter while still in the VAB:
- It costs ~650 m/s dv from Mun surface to low orbit
- Look at the vacuum dv numbers for you craft in the VAB. Let's say it is 3500 m/s dv
- Now remove fuel from the tanks until the craft dv capability is 3500 - 650 = 2850 m/s
- The fuel left-over in the tanks at this point would be your delivery payload to the low orbit Mun station
- Remember to add some +10% margin of error
- You will need some fuel to land again, but this is much less when near empty
By testing that for different designs, you should be able to get close to the optimal TWR required. Generally, the more fuel tank your lander is made out of, the better the payload delivery ratio will be. On planets/moons without atmosphere, the most efficient flight profile is to immediately tilt sideways as much as possible (obviously without losing altitude or smacking into mountains)
-
31 minutes ago, The-Grim-Sleeper said:
Firefox 95.0.2
Oh my, it is not supposed to look like that at all

This is what it looks like on Chrome
I will check that out soon and see whats up with it. I can't think of a simple work around at the moment to use it in Firefox in this state
-
16 minutes ago, king of nowhere said:
1) It seems I can't set targets.
Get within physics range of the other craft, then in flight mode, double-click on the other craft's square marker. This sets it as target. The range is either 2.3km, or hopefully the larger 12km measure (I don't remember which one)
Getting to Mun, do your best to aim for an intercept, but rather undershoot than overshoot. When undershooting (Ap lower than Mun's orbit) you won't hit the Mun itself, and this can save you from an important failure in the early flyby missions.
For Minmus you need it to be about 95° ahead of your spacecraft, and then overshoot Minmus' orbit by as much as its SOI. This increases your chances of hitting the SOI. Obviously do this at the ascending/descending nodes
-
1 hour ago, TheFlyingKerman said:
I'd argue when you have the money for a lv 2 tracking station and tech for a semi-decent rocket to deliver a satellite, money is no longer relevant.
On normal difficulty? Yeah money was never an issue there, just take a Solar space station contract, load the launch vehicle and press spacebar. That requires no extra user input.
But on higher Caveman Challenge difficulties money is always a problem, and bundling satellite contracts have better profit margins per minute of user input, compared to survey contracts
-
On 12/24/2021 at 7:06 PM, miklkit said:
Now I know to get into a solar orbit first.
Don't do this (unless you really want to, I'm not going to stop you
 )
)
I know it seems simpler at first (that is exactly what I did on my first Duna mission) and it is possible, but needs lots of fuel. Instead, the efficient way to go to Duna is to first get into LKO (Low Kerbin Orbit) then keep thrusting at Pe until your orbit is elliptical. (you can plan this by playing with Maneuver nodes, instead of burning actual fuel)
The direction of the elliptical orbit should be so that it points in the same direction as Kerbin is moving around the Sun, this way when you add even more speed at Pe, you will escape Kerbin in the same direction as Kerbin's movement (those speeds kind of add up then).
You will notice that the escape direction and the elliptical orbit won't line up, it needs to point about 35° off to the side instead. Doing this seems complicated at first, but saves a lot of fuel. A youtube video as visual really helps get the point across.
Do you have some screenshots of what you have tried so far?
")
-
Thanks! Let me know how it goes
TL;DR, "Route Type: efficient" finds routes that take the least dv to complete, even if it has to visit extra planets on the way (check the details between each leg of the trip), but this only calculates between distinct steps like going from Kerbin elliptical orbit, to Eve elliptical orbit, and from there to Moho elliptical orbit.
This is cheaper for a host of reasons, but does require you to stay in an elliptical Eve orbit, and launch from there at a perfect time to reach Moho (which is quite difficult given that the direction of that elliptical orbit can't be changed without using more dv). Technically, you can skip those elliptical orbits and just do gravity assists (they work better when you "over do" the intercept a little bit) and that should cut out the orbit capture costs, and even cut down on some more dv.
The way I understand it, in an Oberth perspective, these elliptical capture orbit steps do actually gain some of the advantage of gravity assists but not nearly all of it. Thus I also added the defaulted Direct route type which I hope is more useful for practical gameplay reasons.
For the delta-v total, have a look at the bottom of the Mission Checkpoints panel. That counts up the total dv for the entire mission, considering things like aerobraking, margin of error, etc.
Im not sure if the vacuum/atmospheric dv numbers is something I could show, since those differ wildly by the engine type. I aimed to follow the same methodology of the "subway dv maps", where they display the minimum dv required to launch from Kerbin surface to LKO -
Yes it's in the plan, but not implemented yet. In the future, I want to bring out a feature where users can share mod configs. This way you would be able to select a config that somebody else already set up, if they shared it.
RemoteTech would be one of the mod config packs, and it would allow you to choose the specific RemoteTech antennae
For the advanced placement, you can always edit the craft to set a new placement. Unfortunately it does not save the last locked planet yet, so you have to redefine it every time. I might add preservation of that in a future update
-
Thanks, I hope you nail the landing
For the heatshield thing, I used the Breaking Ground DLC, it has these robotic pistons that can extend/retract when you activate them. I just placed the heatshield on top of that, and gizmo-clipped the assembly upwards into the rocket body.
I set the action group key to the "Brakes" action, this way when i toggle brakes on, it extends the heatshield out beyond the engine nozzles. Just remember to retract it again before firing up the engines again, since they will burn and explode the heatshield.
In-game, this trick works because of a quirk where the most heating gets applied to the most forward part of a rocket. I learned it from some some youtube video from either of the KSP gods (Bradley Whistance, or Stratzenblitz?) explaining it on a spaceplane surviving ridiculous speeds just because the heatshield poked out in front. For our booster, we hit the air bottom first and need it there instead.
There is a real life effect that matches this though, but I have no idea if it is equally useful
-
TL;DR
How to launch a payload into low Kerbin orbit, but recover the booster stage without any mods or 30 second time windows where you have to stress to get the thing in orbit.
This is simple, but to pull this off you will need to be confident in you skills to launch into orbit somewhat efficiently, to land a tube booster, and obviously design the whole thing.
The idea here is that we do not have a barge to land on...so we make the KSC the barge. No need for a boostback burn, and more than enough time to switch view to the payload and sort that out. The fast shallow trajectory also helps out the second stage to require less dv.
- Launch from the Desert launch pad. You may need the breaking ground DLC for this
- Aim East for a trajectory that hits beyond the KSC with an Apoapsis of 70-100 km
- At 60km, deploy the payload
- First, control the booster. Do any correction you would like to, so that the trajectory hits past the KSC, somewhere around the Island Runway
- Switch craft to your payload, and set a maneuver on AP to circularize
-
Stay with the payload craft, burn the maneuver
- Expect about 400 m/s dv, and 0.3+ TWR
- As soon as PE is at 70+ km, switch back to the booster
- With the booster, aim retrograde, toggle Navball to surface mode, extend the heatshield bow shock extender (just a tiny heatshield on a Breaking Ground DLC piston)
- Below 1000 m/s speed, you can open any landing legs or airbrakes
- Pop parachutes as training wheels to make it all easier (probably even saves more fuel this way)
- Land safely, and recover (before walking away)
- Switch back to the payload craft in orbit, and continue its mission
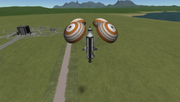
1. - Launcher. Built from1.8m parts, with 6 Thud engines at the bottom. Launch due East, as if going to a shallow low orbit
SpoilerSpoiler2. - Trajectory to KSC. This time I missed the 90° heading mark, so it went a bit South. No worries, we can easily fix this
Spoiler3. - Deploy the payload. It works to start rotating the booster backward during this deployment, it separates them a bit.
Notice the altitude and velocity. The payload is almost in orbit, it doesn't need much more to get thereSpoiler4. - You can worry about the payload later, first go back to the booster
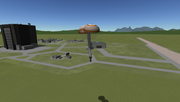
The camera might automatically switch to the payload when you stage the decoupler
- The booster needs a little course correction. In my screenshot, I would hit too far south, so I burned a bit towards north until the landing spot was inline with the KSC, slightly past the Island Runway
- Waiting to do this step later just makes it more expensive
This payload is a re-usable 2nd stage fuel transport. It gets ~4 tons of LFO into orbit. The engines are hidden using BG motors to hide them inside the cavity during re-entry.
Spoiler5. - You have 3+ minutes to sort out the payload orbit. 0.22 TWR should do the job fine, but you can go for 0.5+ TWR for the first few tries
SpoilerSpoiler8. - Get to the booster before the atmosphere does, and you will have no worries at all. Point the flamey end down where it ought to be.
This screenshot was done after I finished my Caveman Challenge NCD career, where all difficulty settings are at max for anything that makes it harder, including 120% re-entry heating.
On the 1.25m booster, I had no heating issues because the speed is only 1800 m/s. But with this 1.8m booster, the heating bars frequently almost maxed out, so I added a heatshield that
extends out in front of the engines. Small price of drag to pay going upwards with such a large vessel, but the heat protection is excellent.SpoilerThe worst of the heating is in this screenshot
Spoiler11. - A drogue chute for early safety, a normal chute to do most of the slowdown. Set the Navball to standard SAS (else it will follow retrograde and could tilt over)
Even with chutes, the descent might be about 20-30 m/s. Much too fast for a landing. Use engines to slow it to 5 m/s. The chutes prevent a violent splashing.
This lands fine on land as well, but water is always flat, so...SpoilerFor the low price of fuel + fairing-shell (and 3% tax), we just put a 5 ton payload in orbit. Land on the KSC continent and you will still get 90% returns on the booster
Spoiler12. - Now go back to the payload, and do the mission that it was destined to do.
This technique has made it possible for me to tripple my contract career profits, because I'm playing with the 10% funds rewards setting (did I mention the NCD Caveman Challenge?).
So everything I launch has to be perfect, or else it eats into the budget that doesn't exist. Using this idea I have been building a 40-50 ton Duna station in orbit that is supposed to also return some Kerbals. The contracts associated with it will bring in about 300k, but I'm sure that disposable boosters for such ship will easily cost 150k. I have spent a little over 30k so far, and this is now on a Fly By course with Eve at the moment.
The downsides to all this
- Your payload will end up in a 7-9° inclined orbit. That is fine if that is where your station is, but it only costs 100-200 m/s dv to fix that, even less if you combine it into the circularization burn
- Extremely inefficient use of booster size. Such a huge booster can easily launch more than a measly 5 tons to orbit. But the launch is nearly free, so it is still many times cheaper even if you have to launch 3 times
- It is hard to do. It took me a few tries but then I got the hang of it. I bet any KSP veteran will struggle on the first try, but it gets easy after the first few tries. It is still harder than normal launches now, but it is easier than doing 2 normal launches (if I had to do those to recoup the funds lost due to disposable boosters)
-
Put it this way, imagine playing KSP and the only fuel we ever had was Monoprop. Build a Jool mission using only that, and it gets quite hard, you have to build pretty big to get just a few kerbals there. Now imagine a "new" fuel gets unlocked, called "Liquid Fuel" + "Oxidizer". Some of these "new" LFO engines don't produce more thrust than the Monoprop engine, and clusters of Monoprop engines can still provide the same thrust as those big LFO engines. So why use LFO then?
The answer to that can also be used for questions like, "why use the NERVA engine?", or "why use the ION engine?" or the orion drive, etc... They all provide a bigger payload capability when using the same mass launcher.
In the end, some are either cheaper, have better TWR, better ISP, run on a fuel that you are already mining, and stuff like that makes it so that most fuel types will always have a place
-
Thanks! Yeah it is an idea that i want to add in the future with some kind of mod configs that can be shared between all users. For now I just focused on the most popular questions like CommNet ranges, and Delta-V
-
Version 1.2.2
-
Features
- New "Margin of Error" control in the delta-v panel preferences; Allows players to set a ratio of extra delta-v to be added to the mission for safety margins
-
Added a Privacy Policy; Please read it to keep me out of trouble
- Better name generator for save games; Instead of random alpha-numerical text, the names now look reminiscent of astronomical naming schemes
-
...and a surprise for those that log in on the 23rd and after
-
Fixes
- Upgrade framework, libraries and dependencies to latest versions
- Focus jumper panel did not update the camera view when switching focus to other planets
If you run into any issues, or have great ideas, please let me know
-
Features
-
1 hour ago, TheFlyingKerman said:
There is no need to be so complicated. SSTO rockets are feasible in stock KSP, even with Lv1 R&D parts.
These are lifters I use for my no career game.
Do you re-enter those from orbit, or are they 2-stage rockets?
I have tried an SSTO rocket easy enough, but the big engines burn on re-entry without good trickery. I had to leave a heatshield ontop to nose-dive for re-entry, or use some robotics to move the heatshield around
-
Luckily there is a tool for that https://ksp-visual-calculator.blaarkies.com/dv-planner
For the mission Kerbin(low orbit) -> Mun(elliptical orbit) -> Minmus(elliptical orbit) -> Kerbin(aerobraking low orbit) it costs
1063 m/s dvFor the mission Kerbin(low orbit) -> Minmus(elliptical orbit) ->Mun (elliptical orbit) -> Kerbin(aerobraking low orbit) it costs
1132 m/s dvThat's a difference of 69 m/s dv, so nothing much to worry about.
You will need to add the extra fuel if you want to go down to a landing on the surface and such, and if you do Apollo style landings you would save fuel by going to Mun first, because then you don't have to drag that fuel with you to Minmus anymore.
-
2 hours ago, king of nowhere said:
Also, I can't figure out what "Mdry" and "Mpayload" are exactly:
I didn't make this so I can't confirm if this is 100% correct, but the whole equation is built around the question of:
Given a certain payload, how big should the launch vehicle be to get that payload up to the specified speed (or delta-v).So I believe all variables relate to the total mass of the rocket. The main purpose is to show how much less rocket mass is required when staging once, and also the effect that differing the stage sizes have. The green line shows what total rocket mass is needed for the same delta-v, just because it staged instead of going SSTO. To get to the bottom of this, you simply need to read into the equations, they are all on screen showing their interactions in pure math.
Admittedly it is hard to use this as a tool in KSP, because of the limitations that you described. It would still be quite interesting hearing everyone's process for approximating good stage size ratios, or even to see an implemented tool that does that.
Keep in mind that this equation link was part of an answer to a stackexchange question, where someone wanted to know why do all rockets have stages. We take this knowledge for granted, of course staged rocket have so much more delta-v
 ...but if you had to explain that to someone without KSP, this equation seems pretty useful in that regard
-
2 hours ago, jimmymcgoochie said:
Uh, what? Second stage double the weight of the first stage below it?
My bad
I was counting stages the way that KSP counts them, with stage 1 being at the top, stage 2 below it, and stage 3 at the very bottom as the first thing that fires when you press spacebar on the launch pad
I definitely don't build bobble head rockets

-
TL;DR
Multi stage rockets are generally more efficient, but what size should the stages be?
I found this cool demo that calculates the final delta-v of a 2-stage rocket, depending on the size of the stages relative to each other. I just wanted to share this with KSP players, and if a good discussion comes out of this, even betterhttps://www.desmos.com/calculator/9dhepscogp
(original link found in stackexchange https://space.stackexchange.com/a/56105)
It is an interactive equation that lets you drag around the mass ratio (b) of 1st stage to 2nd stage, and see the results on the final dv.My optimal ratio between stages are usually 2/3. To get this. look at the mass of the entire
1stupper stage. Then build a2ndlower stage that masses 2x the1stupper stage's mass. Continue doing this for even more stages... I think the included price of engines have an effect here.But it looks like perfect stage size could get more complicated than that, depending on the specific mission that you have in mind.
-
10 hours ago, Scarecrow71 said:
and I've got several buildings to level 2.
Not exactly methods of income, but saving money might help solve your situation:
- You can save some money by upgrading only the VAB or SPH (not both). You can easily build and launch rockets from the SPH (I prefer the editor camera in SPH), and also only upgrade the Runway or Launchpad (not both). Once you reach Jool you could then consider upgrading the other building
-
SSTOs are probably too far up the tech tree, but falcon style re-usable launchers can really cut down on the price to orbit. Normally, they are not worth the effort (having to panic between 2 craft at the same time is not fun), but if you launch from the Desert launch pad towards the KSC, you can get the booster on a trajectory to hit the KSC while having the payload about 400m/s away from a circularized orbit. This gives you plenty of time to worry about only a single craft at a time
- Launch and aim for an Ap of 100km, that also intersects the bigger KSC area
- Once the rocket is above 60km (or whenever you feel the atmosphere is thin enough), decouple the payload
- Do corrections on the booster to aim almost at the Island runway (refine this with practice)
-
Only then do you switch over to the payload. It should be still going up and at +-80km already. Do the circularization burn (maybe point 5-10° down
 ). You will have like 2 minutes before the booster hits the atmosphere. Once the payload has a Pe of +70km, switch back to the booster
-
Aim the booster retrograde
 , the engines should survive the heat because it is not moving at orbital velocities yet
- Good designs could "glide" a bit to get closer to the KSC, but just landing on the continent already gives you a +90% refund
-
Use parachutes and whatever you can to make it easier. Aim at radial out
 with the Navbal in Surface mode, this will aim perfectly upwards for easy landing burns
-
Are you having trouble finding the engine part that you are supposed to use in Advanced Construction (level 3?), but the part is not visible in the side menu?
-
Version 1.2.1
-
User Features
- New profile pictures can be uploaded and cropped for the perfect fit
- No need to log out and log back in again to verify account status; Automated the account upgrades for supporters from https://www.buymeacoffee.com/Blaarkies
-
Fixes
- Joolian moons were missing dv numbers for 'Surface' and 'Low Orbit' flight situations
If you run into any issues, or have great ideas, please let me know
-
User Features
-
On 4/13/2021 at 3:36 AM, The Everyday Kerbonaut said:
I like real time recoveries, Because it feels boring rewinding time and coming back to the mission.
To get around the "controlling 2 craft" problem, i have been doing such launches from the Desert runway launch site.
- Start there with a falcon 9 type of rocket, launch east (maybe slightly to the north, heading about 85 degrees)
- Thrust until the trajectory hits a little past the KSC, with an AP around 100km
- By the time you exit the atmosphere, you can decouple the payload an get that into orbit for about +400m/s dv.
- At this point you have lots of time before having to worry about the booster (but an Ion engine will obviously be too slow)
- The booster can make a few course corrections before/after the payload is already in orbit
- The booster will get hot during reentry, but it's not going at orbital speeds yet
- Im using 120% reentry heating, so on normal it shouldn't be a worry
- As long as the booster lands on the KSC continent, you get like 90% or more recovery funds
On the downside, this put the payload into a 10° inclination orbit (maybe even more?). So it is fine if you are going to higher orbits anyway, or Mun/Minmus. For LKO refueling, this would need launch windows -
On 10/9/2021 at 10:17 PM, maizwilling said:
Bin ich etwa bekloppt?
Ganz nicht
On 10/9/2021 at 10:17 PM, maizwilling said:Aber dann soll ich das Schwenker-Triebwerk platzieren. Aber dieses fehlt links in der Teileansicht.
Mit neuen updates zu den Triebwerk teilen gibt es etwa Probleme mit der Tutorial. Sie wollen dass dich ein Teil wahlen, die leider nicht verfügbar ist weil er alt/outdated sind.
Glücklich sind diese alten Teilen noch immer in dem spiel, nur versteckt. Die Lösung ist um die fortschrittliches Teilansich zu offnen, hier gibt ein Bild die es besser erklar:
Bitte verzeih mein Fehler in Deutsch Sprache, es ist noch ein neuer Sprache für mich

-
In case it just gets lost in the deeper nested post above, here is a delta-v calculator that I have been working on. Unlike the subway maps, this can determine the delta-v requirements for missions that do not start/end at Kerbin, and handles multiple checkpoints if you plan on going to more than one place.
It is not a paper map, but it runs on a tablet/phone so it could be a useful guide on your desk while playing KSP
")

 )
)
")
 300k, but I'm sure that disposable boosters for such ship will easily cost 150k. I have spent a little over 30k so far, and this is now on a Fly By course with Eve at the moment.
 ...but if you had to explain that to someone without KSP, this equation seems pretty useful in that regard

 ). You will have like 2 minutes before the booster hits the atmosphere. Once the payload has a Pe of +70km, switch back to the booster
 , the engines should survive the heat because it is not moving at orbital velocities yet
 with the Navbal in Surface mode, this will aim perfectly upwards for easy landing burns

New years wave moving west at 465 m/s
in The Lounge
Posted
Today, at the equator, there is a "mexican wave" moving westward of people celebrating years, faster than the speed of sound!
Fireworks and stuff like this is probably not visible from the ISS though, or is it?
I thought that was pretty cool, I hope this sparks more discussion about stuff of this nature